Week #26 – Best City Nails
From now on I will be making video tutorials on the amazing BEST CITY FASHION Youtube channel, so subscribe for amazing nail art techniques and lots of other wild, style and fashion videos!

Week #25 – WE’RE BACK…this time with Moomins (crack repair tutorial)
If anyone out there has been waiting the return of Best City Nails, the time has come. The ‘professional reasons’ for neglecting this fine art form are being IGNORED henceforth.
So, to mark our return here’s a tribute to my favourite kids’ TV show (and also to the orignal comics by Tove Jannson, a very inspirational woman). I loved the Moomins when I was little and I still do.
The Moomin Papa nail was seriously cracked and has been repaired using teabag paper and glue. I don’t think you can really tell so for details on how to do this, see below.
Click pics for HD.
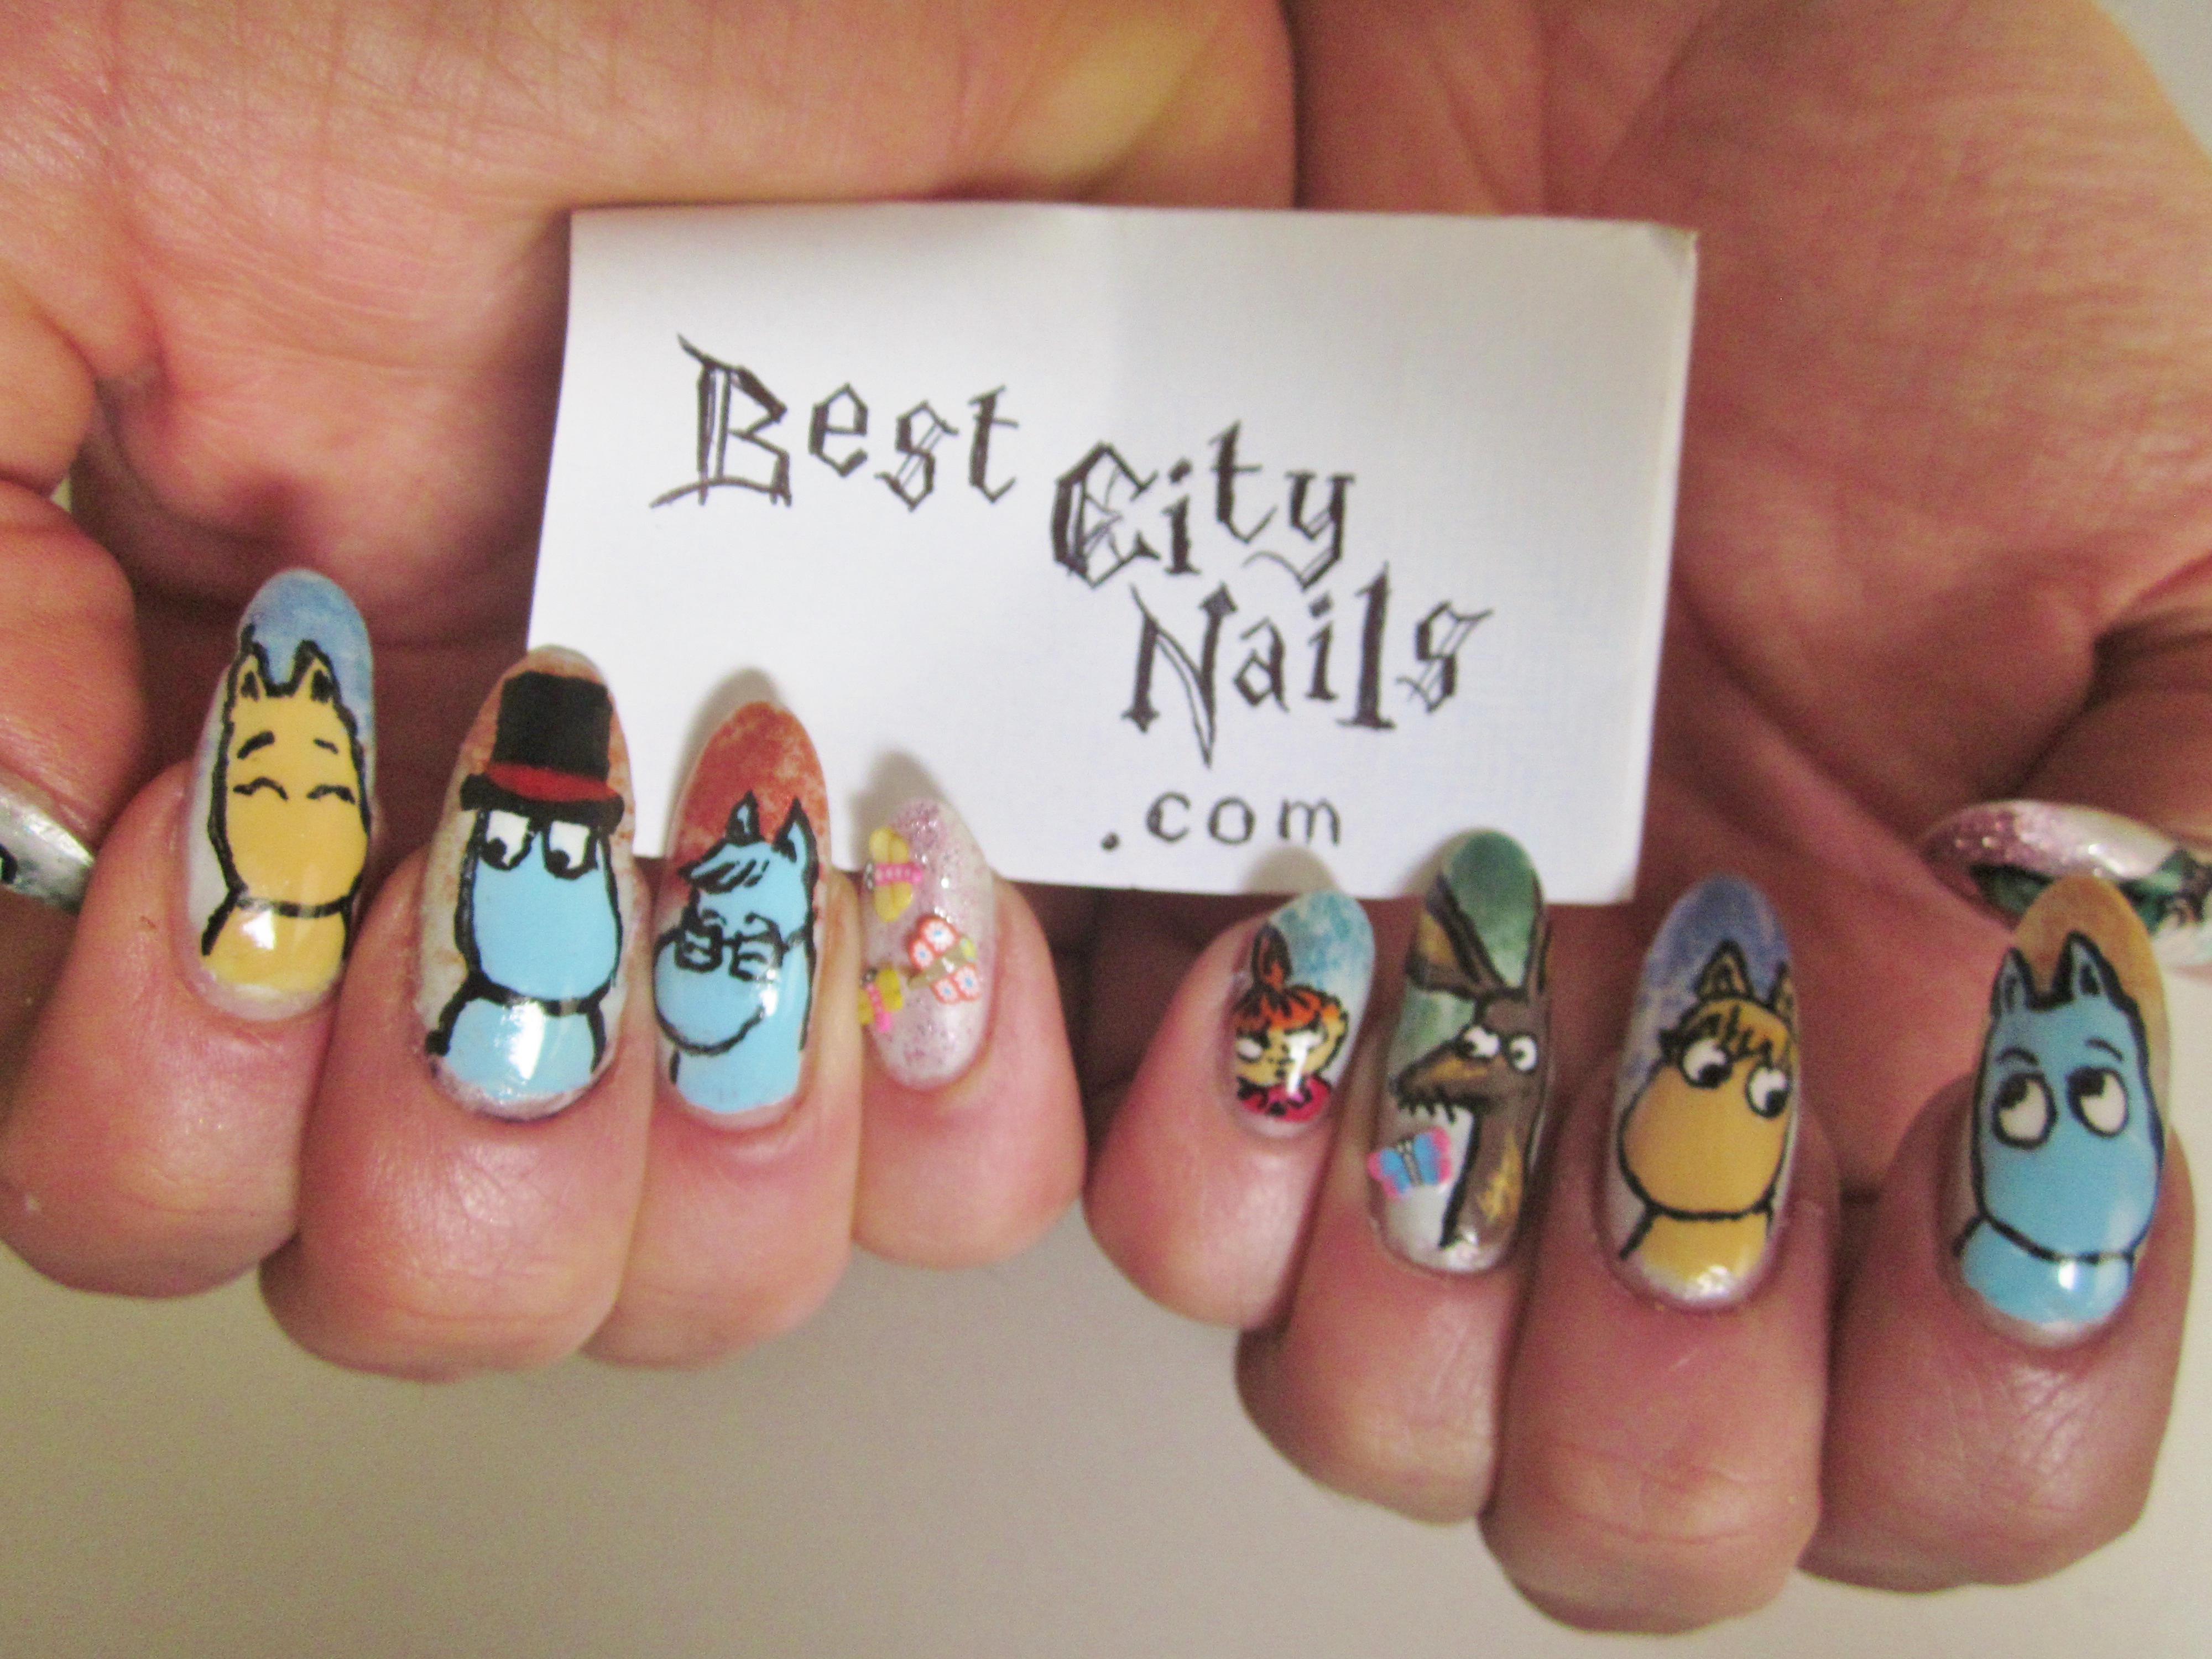
The usual techniques have been used: base colour of eggshell blue, Barry M loose eye shadow powder sprinkled on top of this, then the basic shapes and colours to build the characters and their clothes, then a layer of Seche Vite to dry, then black line details with a liquid eyeliner, finally another layer of Seche Vite and some 3D butterflies from the nail section in Poundland.
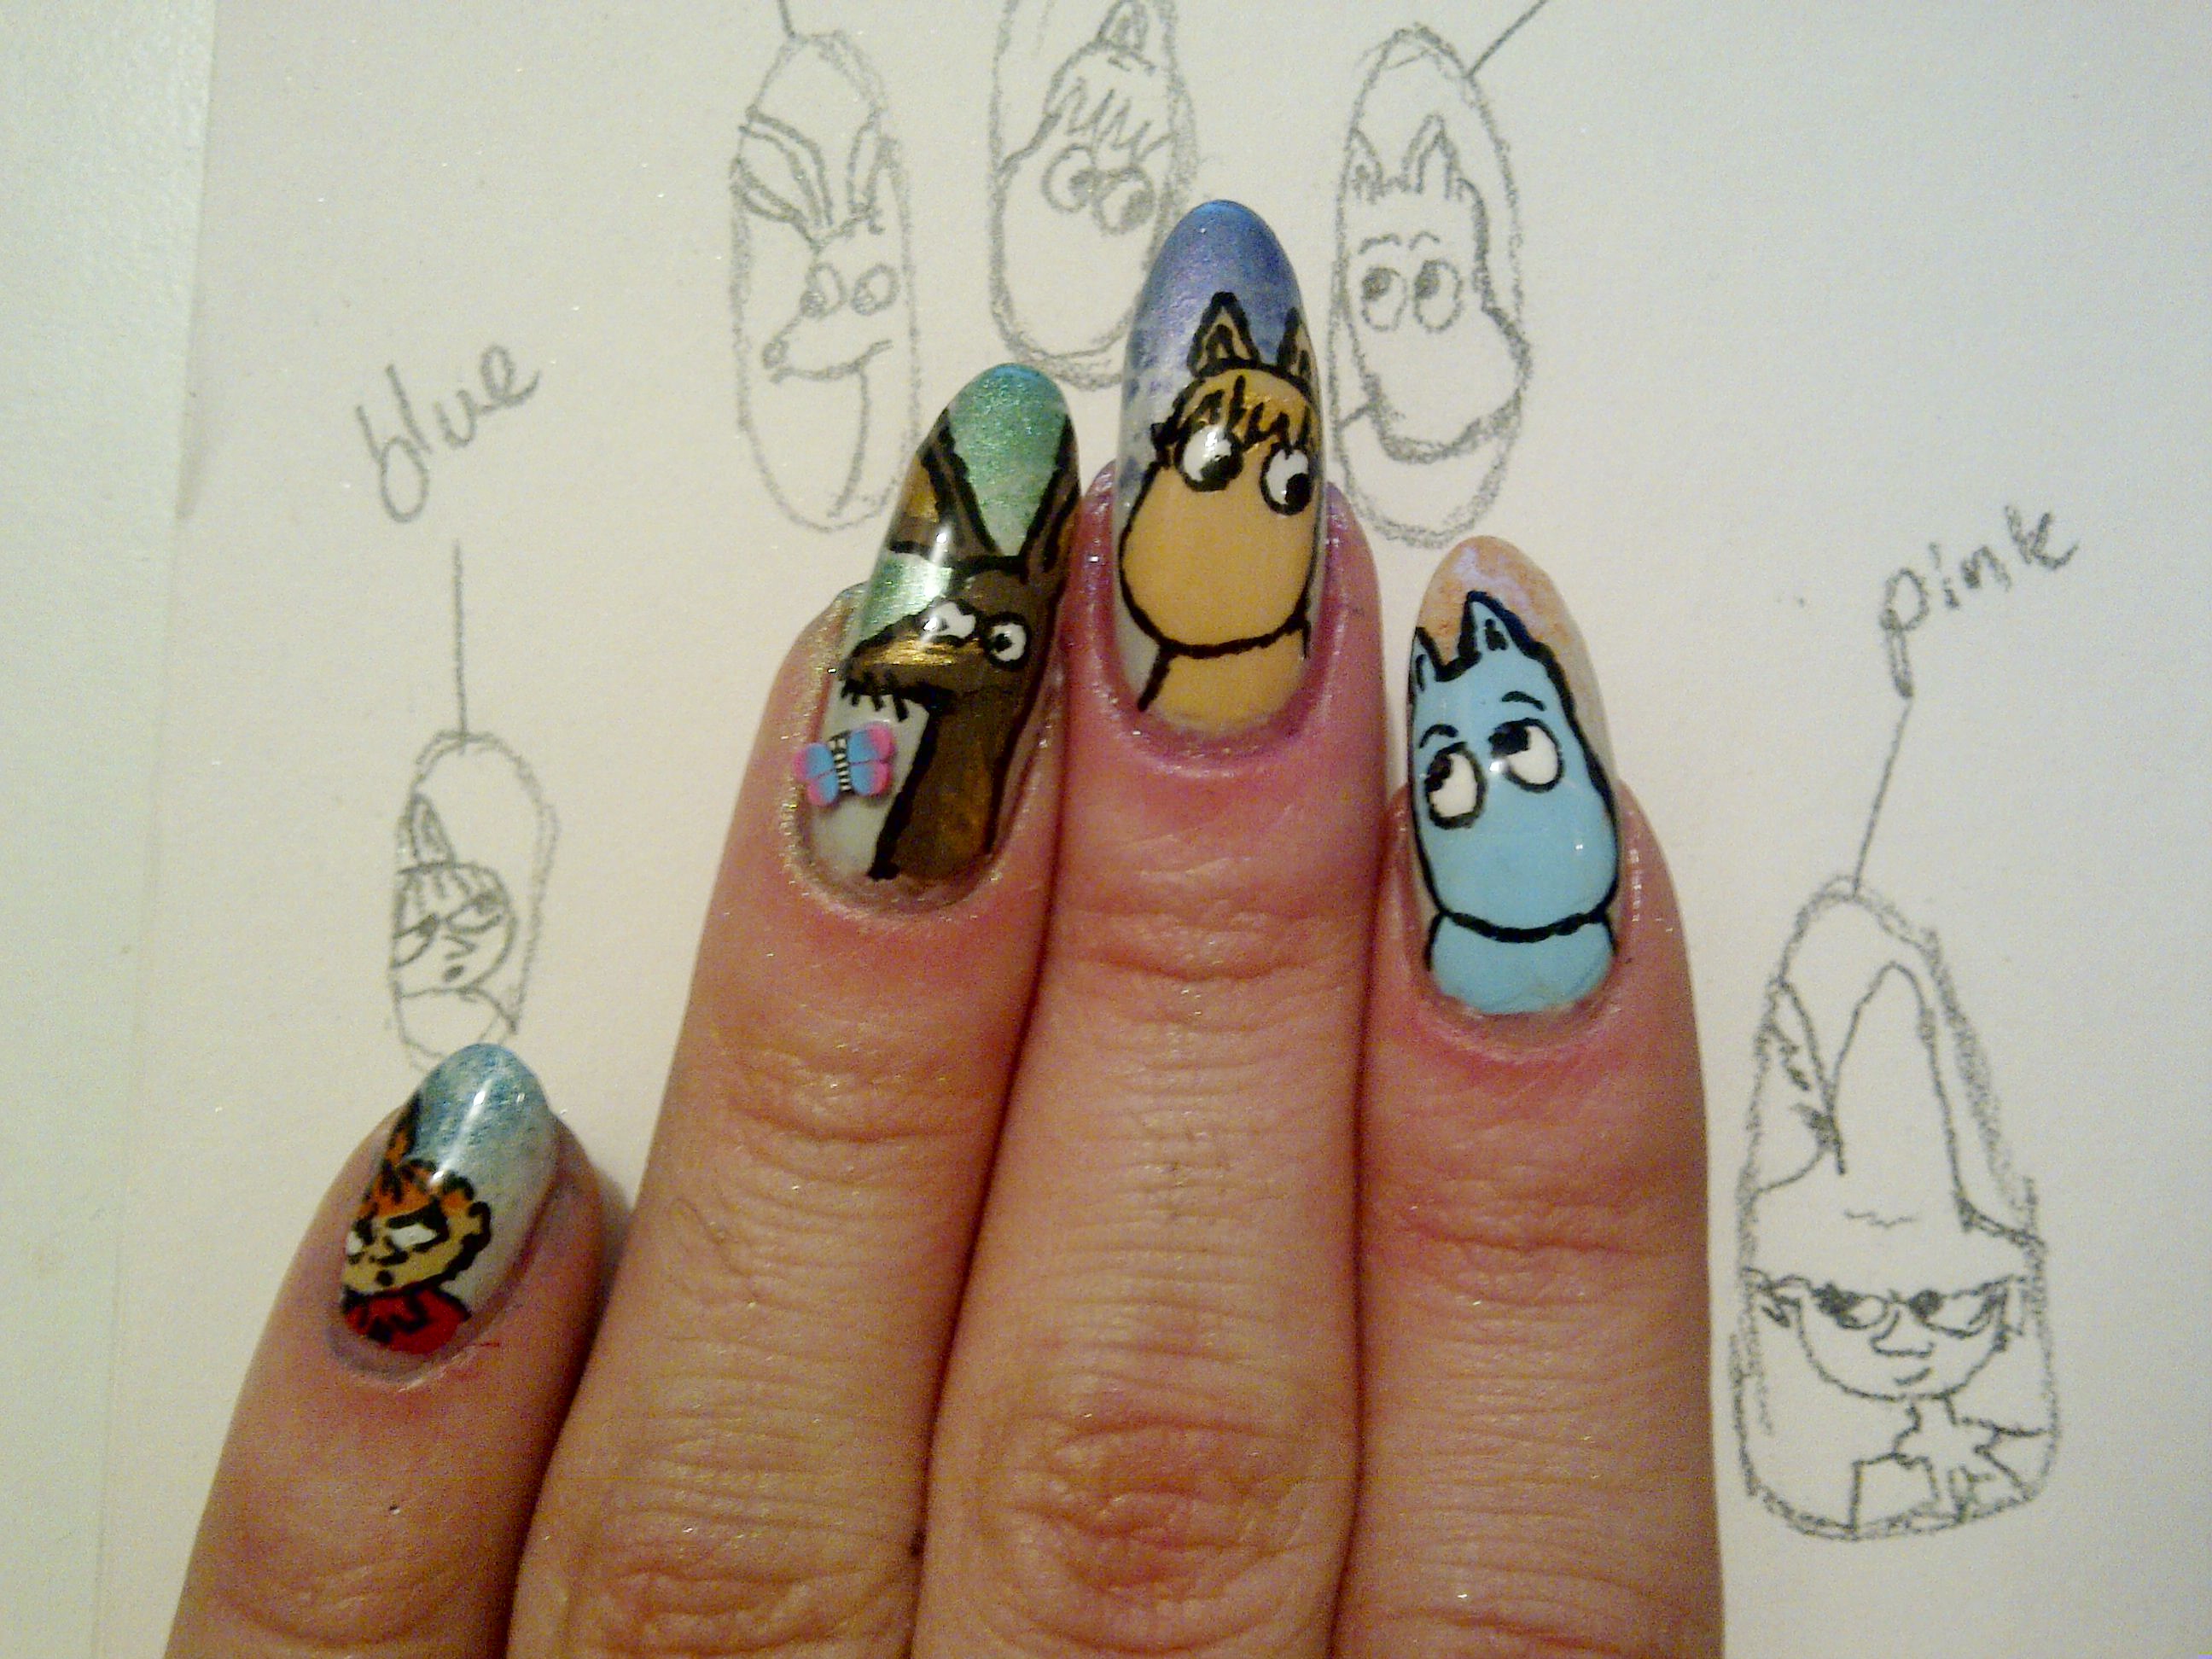
The design process!

Much more pleased with this hand; I like the way the characters are interacting with each other.

Snufkin and the Hemulen. You can see one of the butterfly 3Ds here. I do realise one nail is a lot shorter. Reminder that we’re working with REAL nails here. This thumb died before I came across the useful trick below.
REPAIRING CRACKED NAILS
The middle finger on the RIGHT hand sustained a serious crack. I decided not to let this get in the way of my nail art comeback and used this teabag trick to strengthen the nail.
Instead of nail glue I used superglue, and I didn’t bother with a base coat so I am not sure how easy it will be to change my nail polish! But life’s too short of base coats god damn it.
Although the tutorial below is 8 minutes long (it’s not me) once you watch it once you feel like you know what to do and it is easier and less fiddly than I imagined it might be.
We’re on haitus, but also EXPANDING
Those loyal to City Nails will have noticed a definite slowing in the number of posts.
This is because I cannot have long nails at the moment for work reasons.
I will try to continue posting street style, etc and responding to nail inquiries, however I will not be posting pictures of my own nails until I am able to grow them again.
HOPEFULLY THIS WILL BE SOON!
In the meantime please enjoy the first teaser of a new video project between me and some friends, BEST CITY FASHION!
Big Love,
Best City Nails.
Week #24 – Fantastic patterns
This ‘week’ we just decided to go for some really fantastic patterns. Just a bold colour with freehand black patterns over the top.
And with a POWDER GRADIENT contrast nail.


Here we opted not to cover the crystals with a top coat and therefore many of the were lost in the battles of everyday life, as you can see below.

6.8/10
We are quite into these but it is not the extravaganza we had dreamed of. Dreaming bigger for the future. You know. Soon photography standards will return to normal as well, you will all be relieved to know.
Week #23 – 3Ds
More experimentation with pretty basic 3D techniques (Poundland crystals, in fact).
The main difficulty here is whether to top coat over the crystals. If you do, they stay on for weeks but they loose their sparkly-ness as the top coat smooths over all the facets. If you just glue the crystals to a finished nail and leave it at that, they might stay on for two or three days. YOUR CALL.

Above, crystals without top coat.

Above, with top coat over crystals.
The difference is far more pronounced than it appears in these shitty phone photos. Apologies for this also; temporarily lack decent photography solutions!
6.2/10
You know you’ve seen more exciting nails on this blog. It is what it is.
Week #21 – HOW TO: Galaxy nails with neon contrast
This week we’re taking City Nails into SPACE, and of course going for a nice futuristic contrast nail, too.
We tried out a milky-way inspired look, at the request of a reader (hai girl!)

CLICK FOR HD
Step #1
Begin with an even coat of black on each nail.
Step #2
Apply a second black coat (we are using Rimmel 60 Seconds), and nail by nail, apply a large patch of very dark blue or purple Barry M powder (Black Purple, Barry M used here), or similar. Then, within the confines of the patch, sprinkle a smaller amount of a lighter colour (Barry M’s Denim). You are trying to achieve the look of an area of light merging to darkness…but working backwards.
To apply powder, dip a makeup brush in the powder, tap off excess powder and then, holding the brush above the nail, tap the handle so the powder falls. You can then blow on the nail to spread it out. See this old post for more detail.
Step #3
Once you have black paint, and two darkisk-powders laid out, apply a clear top coat. This is not the final stage, this is just to wet the nail for more work.
Step #4
Apply fine glitter (Barry M, Light Blue) and coarse, regular-style glitter in silver artfully over the top of the clear top coat. Try and concentrate in one area (the same patch that you first began with) so that it looks like a galaxy rather than an even spread. Once you have the glitter, add groups of larger stars with a white striping brush. Some can be just dots, but add bigger circles with flickers/rays coming out too.
AS YOU CAN SEE on ours, we positioned the centre and direction of the ‘galaxy’ slightly differently on each nail.
Step #5
Finish with a top coat like Seche Vite.

CLICK FOR HD
I include pictures with and without flash to try and demonstrate these nails more accurately. They were very sparkly.
8/10
A healthy score. We really enjoyed these, and they were very quick to do compared to our highly-illustrated looks more recently. This all probably took only 20 minutes or so. We hope you’re encouraged to try them out! The instructions may sound complicated but it is pretty easy, really.
Also the pointier tip shape is a lot of fun, and adds an edge to the simpler design.
Week #20 – Nautical nails
Farewell, my lovely Nancy, for it’s now I must leave you,
All on the salt seas I am bound for to go;
But let my long absence be no trouble to you,
For I shall return in the spring, as you know…
This week we’re serving up some serious maritime realness!

Standard skull with crossed sword and bone, the desert island and sunset (a classic 90s nail motif) a ship, circled in rope over a parchmenty effect (white dappled with yellow powder) an anchor, and some merpeople!
So far the sunset proving by far the most popular (when fingers placed together it forms a whole island, like two pieces of a jigsaw – the merpeople compliment each other in a similar way).


I am proudest of the ship, though, as I thought that one could go very badly.
Skull and crossbones is black painted over a white background, oddly, just because I thought this would be easier.

[click on above image for mind-blowing HD]
9.8/10
You love it, we love it.
Goin this way, that way, forward and backwards, over the deep blue sea,
A bottle of rum to fill my tum and THAT’S THE LIFE FOR ME!
Nail Street Style #5
This is Chan. She is a hip young thing who we met in Topshop.

We had to get a picture of these dream talons, which a friend did for her.

Chan always has nails done so I asked her about phones and she said:
“I used to have a Blackberry but my nails were actually completely ruining the keys, so I have just changed to an iPhone and I hate it. I absolutely hate it! I’m like [mimes trying to use a touch screen with a really flat finger.]”
Well we all know about that, but who needs to be able to use a phone when your glittery, Chanel nails looks so sickening?!
Week #18 – Springtime nails

For our Easter nails we have gone for two nails decorated with patterns inspired by ones you typically find on springtime confectionary packaging, some Easter bunnies, some daffodils, and a Christian cross in springtime colours, to remind us of the sacrifice of Christ.
I am constantly amazed by the triumphs and challenges nail art presents. You would think that the white rabbit or the daffodils would be, by some margin, the trickiest nails here, and yet these designs have produced strong results, and the straight-forward looking crosses are the wonky villains letting the team down.
Sorry, but I haven’t included any instruction or photos of different stages because there’s too many techniques involved when every nail is different.

Click on image for ludicrous HD.
9/10
We’re quite proud of how these have gone, and may have even gone for a rare 10/10 score if the crosses were a little neater but unfortunately we were hurried just as were finishing those two. Not 100% sold on the gold swirly fingers, either – I would never have done a design like this if it weren’t inspired by Easter eggs, and there is a brown to purple Powder Gradient which is not as visible as hoped.
But Best City Nails is not about perfection – it is about spirit.
May the true spirit of Easter be with you this weekend.
“And he saith unto them, Be not affrighted: Ye seek Jesus of Nazareth, which was crucified: he is risen; he is not here: behold the place where they laid him.” – Mark 16:6
