Week #21 – HOW TO: Galaxy nails with neon contrast
This week we’re taking City Nails into SPACE, and of course going for a nice futuristic contrast nail, too.
We tried out a milky-way inspired look, at the request of a reader (hai girl!)

CLICK FOR HD
Step #1
Begin with an even coat of black on each nail.
Step #2
Apply a second black coat (we are using Rimmel 60 Seconds), and nail by nail, apply a large patch of very dark blue or purple Barry M powder (Black Purple, Barry M used here), or similar. Then, within the confines of the patch, sprinkle a smaller amount of a lighter colour (Barry M’s Denim). You are trying to achieve the look of an area of light merging to darkness…but working backwards.
To apply powder, dip a makeup brush in the powder, tap off excess powder and then, holding the brush above the nail, tap the handle so the powder falls. You can then blow on the nail to spread it out. See this old post for more detail.
Step #3
Once you have black paint, and two darkisk-powders laid out, apply a clear top coat. This is not the final stage, this is just to wet the nail for more work.
Step #4
Apply fine glitter (Barry M, Light Blue) and coarse, regular-style glitter in silver artfully over the top of the clear top coat. Try and concentrate in one area (the same patch that you first began with) so that it looks like a galaxy rather than an even spread. Once you have the glitter, add groups of larger stars with a white striping brush. Some can be just dots, but add bigger circles with flickers/rays coming out too.
AS YOU CAN SEE on ours, we positioned the centre and direction of the ‘galaxy’ slightly differently on each nail.
Step #5
Finish with a top coat like Seche Vite.

CLICK FOR HD
I include pictures with and without flash to try and demonstrate these nails more accurately. They were very sparkly.
8/10
A healthy score. We really enjoyed these, and they were very quick to do compared to our highly-illustrated looks more recently. This all probably took only 20 minutes or so. We hope you’re encouraged to try them out! The instructions may sound complicated but it is pretty easy, really.
Also the pointier tip shape is a lot of fun, and adds an edge to the simpler design.
Week #13 – Happy New Nails! Masking tape adventures…
Seems ridiculous, as masking tape is such a staple in the word of intermediate-level home-manicures, but this is our first foray into masking tape fun.

What do you call this look anyway? It’s not Cubism? Art deco? Geometric? Dunno what it is exactly but it’s lookin fressshhhhhhhhhhhhh

SOME TIPS: See that pink colour and that purple colour? They’re actually the same, but just with the black or white base showing through SO, maybe it would be better to start with all the nails the same colour to avoid unexpected variety and/or use good quality, thick-texture varnishes, not like me at CheapSkate City.
6.8/10
The nails look a lot better in the top photo which used a flash, and they look at lot better in real life, but I feel I can put the masking tape technique to better use, I feel the gold stripes are a bit too thick AND there are a couple of vexing imperfections (that terrible whisker of white on the index finger could easily be edited out, but these photos are all bona fide and honest so you can join me in my quest for excellence).
And DON’T FORGET I have added these new special buttons to make it easy for you all to TWEET, FACEBOOK AND TUMBLR Best City Nails. SHARE THIS SHIT.
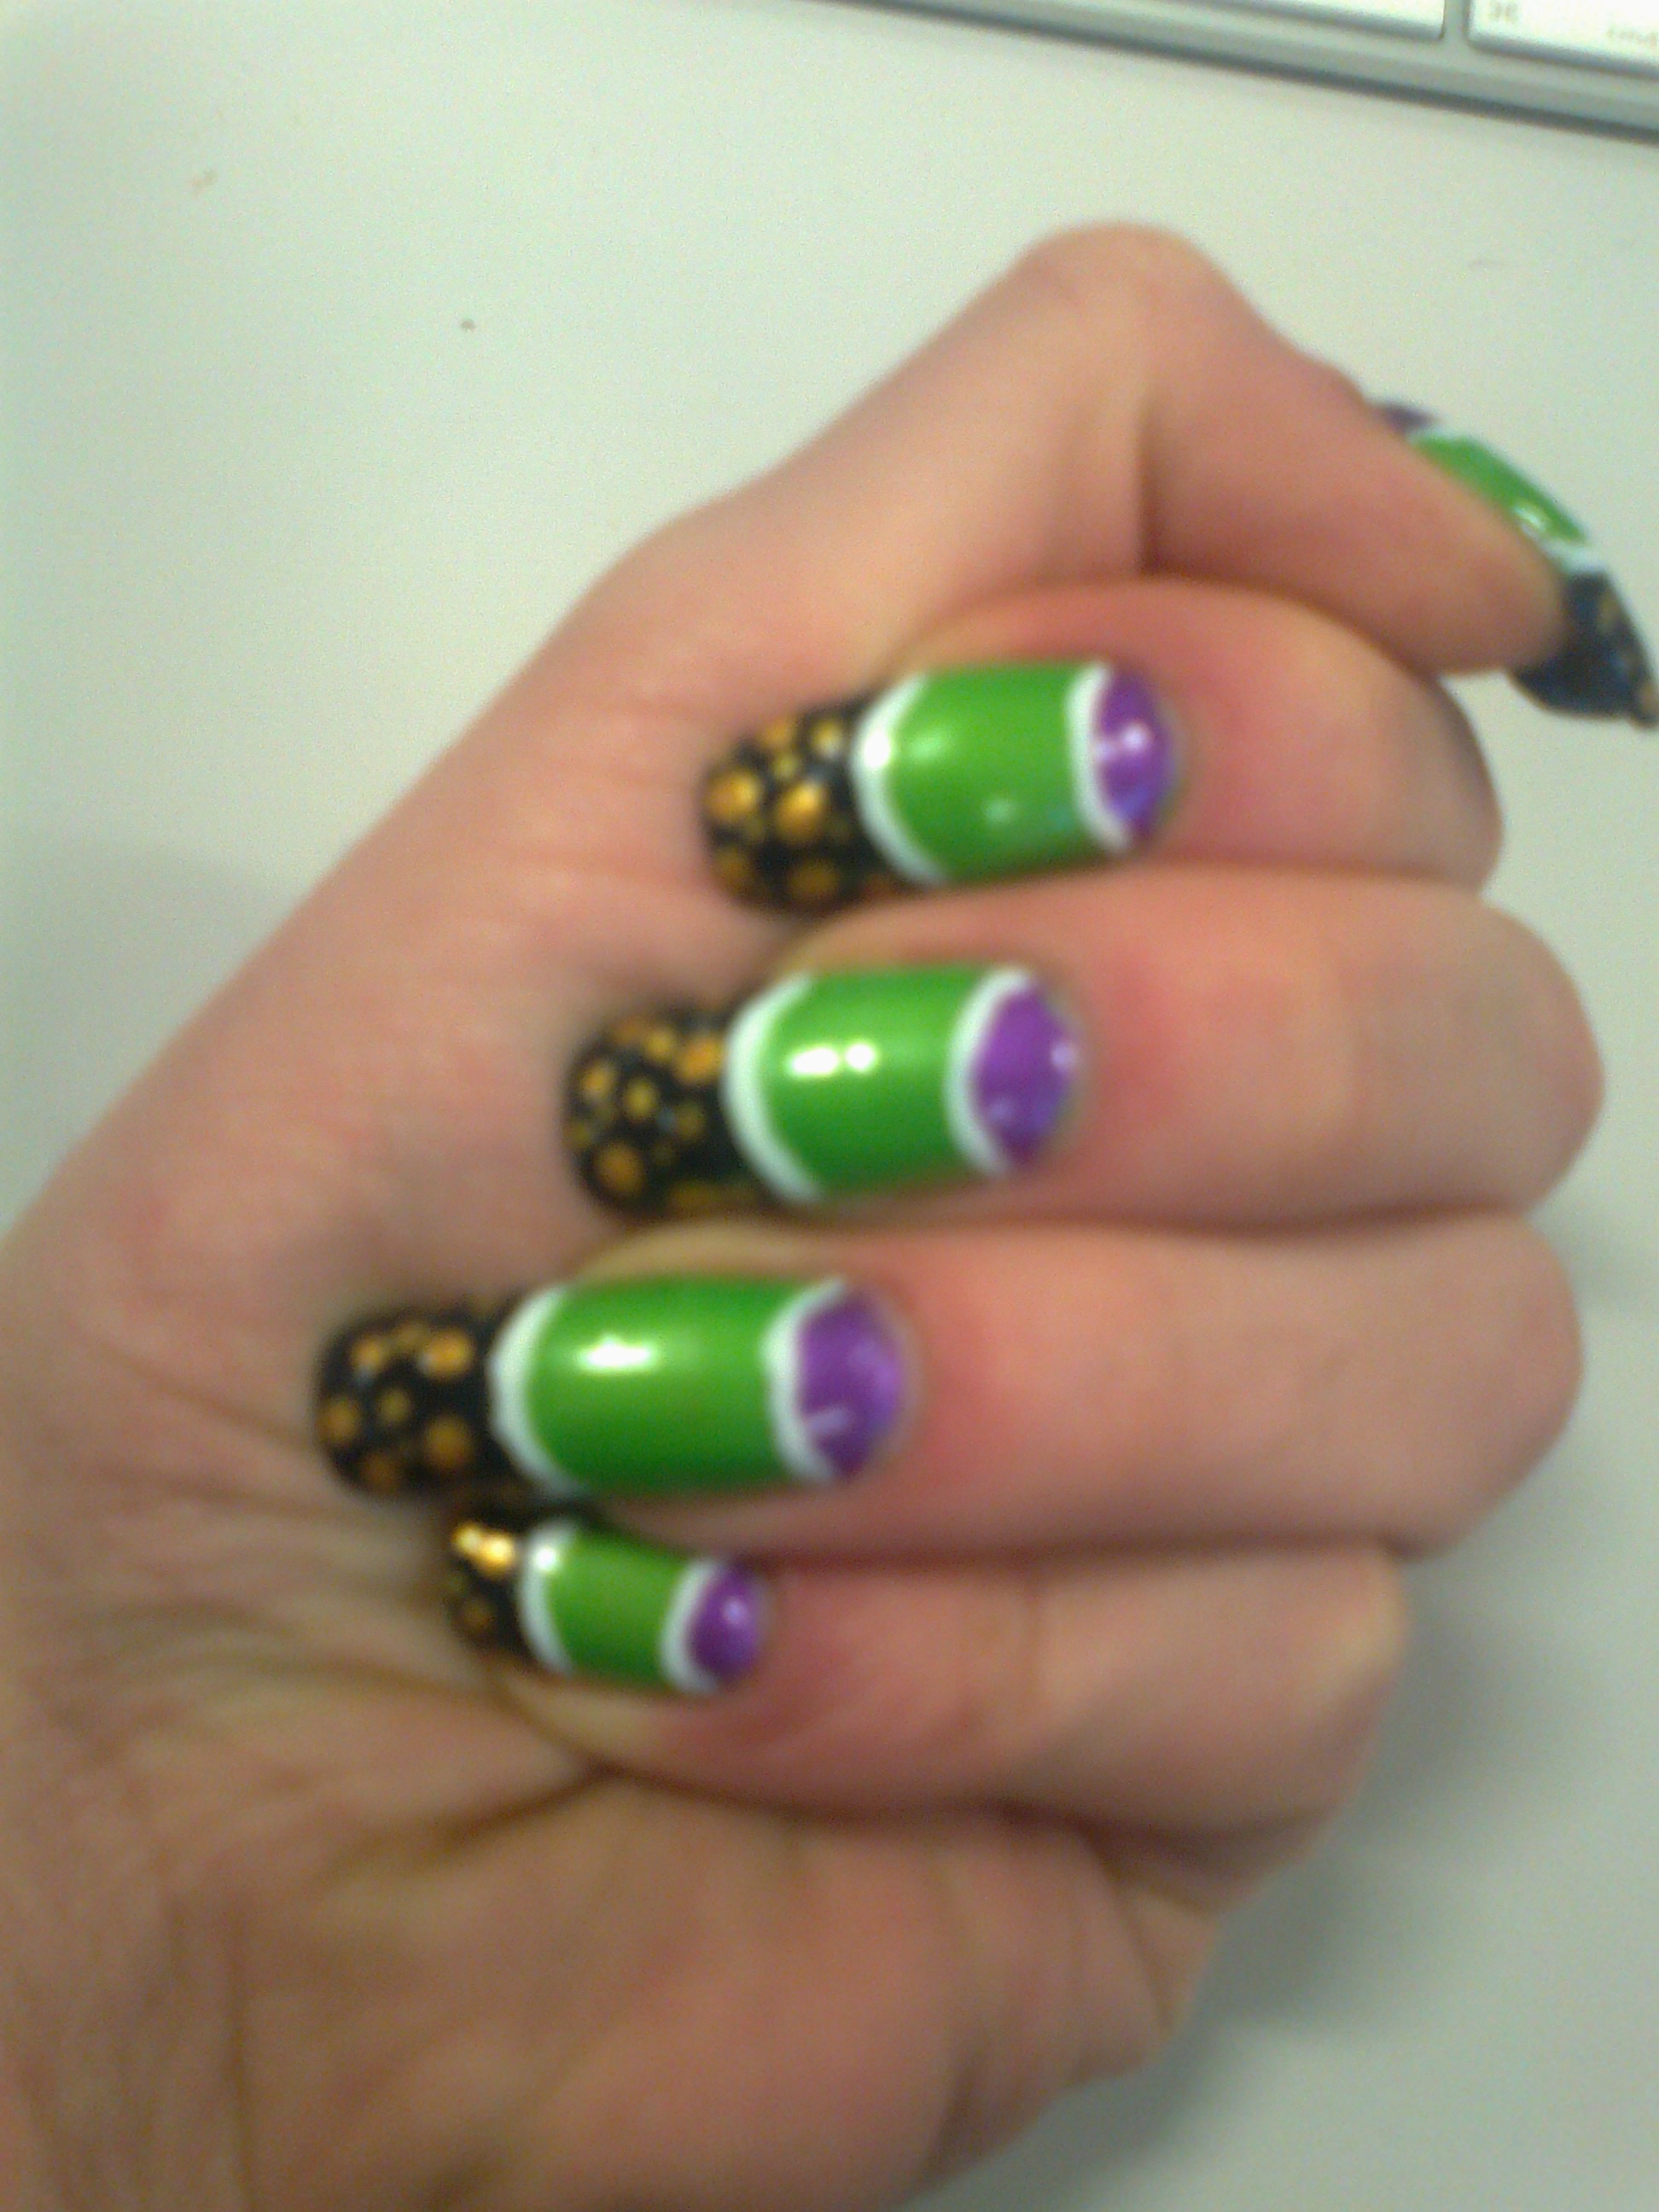
Week #1
AMAZING:


WHAT WE USED:

L-R:
Saffron London ‘Ultra Nail Polish’. Colour 48 (frozen pea green), from eBay
‘Flexbrush’ – gold striping brush, from eBay
No. 7 – ‘Stay Perfect’ in Betty Blues (more then one layer and it’s pretty much black)
Seche Vite – Dry Fast Top Coat
And of course, SUPER GLUE!
[As you can see there is also purple and white used in the manicure, which were from a set of very cheap striping brushes/pens, available on eBay]
Step #1

Paint the green over the nail bed, using a curved stroke at the top to avoid the tip of the nail. If one nail is broken or shorter than the others, leave a bit of extra space unpainted at the top so that not all the nail bed is covered and the tips all look proportional.
Use enough polish for the brush not to drag and leave marks. Vertical strokes along the length of the nail are easier to control and give a better finish than horizontal ones, but you may need to vary your strokes to get an even, plasticy look.
This is two coats.
Step #2

Paint your tips. Don’t be tempted to go along the width of the nail – use three or four carefully-angled VERTICAL strokes, and it will be easier to control. It doesn’t matter if the line between the two colours is a bit raggedy because you’ll be going over it with the striping brush.
Step #3

Use the gold striping brush to put dots across the tips Start with three or four big blobs, which you almost drip on from the tip of the brush. Then scrape excess varnish off the brush and then use the blobs already on your nails to dip the brush into. This gives you the light amounts of varnish you need for your smaller surrounding dots.
These dots can take a while to dry, as it’s quite a lot of varnish. That’s cool though, because you still have to do the purple half-moons and white dividing lines.
Step #4

Then add purple half-moons using a purple striping brush, and white dividing lines using a white striping brush.
With the white lines, it’s best to go from the centre of the nail, and out to either side (if you go from the outside in, your two lines might not meet at quite the same height like this: —__ and if you try to do it in one swoop, well, it’s your funeral).
Of course you better add a good TOP COAT. Waint until your nails are dry to the touch of your lips before using a top coat. If you have a fast drying top coat like Seche Vite, or you have time to kill, you better use TWO coats, for an extra-smoothe, acrylic look.
Ooohh yeah.
8/10
– because I am not 100% sure about the colours. It’s not the green and purple (that’s a classic satisfying clash), it’s the further combination of black and gold…am I trying to combine two worlds in one? At times I think so. So we lose two marks.
***
Stay tuned for more BEST CITY NAILS…
